Tutorial: Writing Your Own Node
This tutorial illustrates how to write your own gunpowder node. We will
cover the following topics:
We will use the same example data used in the previous tutorial. To follow along with the tutorial, have a look at the following preliminaries:
Tutorial Preliminaries: Data Preparation and Helpers
To follow the example here, install those packages…:
pip install gunpowder
pip install zarr
pip install matplotlib
…and run the following code to set up the dataset and define a helper function to display images:
import matplotlib.pyplot as plt
import numpy as np
import random
import zarr
from skimage import data
from skimage import filters

# make sure we all see the same
np.random.seed(23619)
random.seed(23619)

# open a sample image (channels first)
raw_data = data.astronaut().transpose(2, 0, 1)

# create some dummy "ground-truth" to train on
gt_data = filters.gaussian(raw_data[0], sigma=3.0) > 0.75
gt_data = gt_data[np.newaxis,:].astype(np.float32)

# store image in zarr container
f = zarr.open('sample_data.zarr', 'w')
f['raw'] = raw_data
f['raw'].attrs['resolution'] = (1, 1)
f['ground_truth'] = gt_data
f['ground_truth'].attrs['resolution'] = (1, 1)

# helper function to show image(s), channels first
def imshow(raw1, raw2=None):
  rows = 1
  if raw2 is not None:
    rows += 1
  cols = raw1.shape[0] if len(raw1.shape) > 3 else 1
  fig, axes = plt.subplots(rows, cols, figsize=(10, 4), sharex=True, sharey=True, squeeze=False)
  if len(raw1.shape) == 3:
    axes[0][0].imshow(raw1.transpose(1, 2, 0))
  else:
    for i, im in enumerate(raw1):
      axes[0][i].imshow(im.transpose(1, 2, 0))
  row = 1
  if raw2 is not None:
    if len(raw2.shape) == 3:
      axes[row][0].imshow(raw2.transpose(1, 2, 0))
    else:
      for i, im in enumerate(raw2):
        axes[row][i].imshow(im.transpose(1, 2, 0))
  plt.show()
The data we are working with is shown below. It is stored in a zarr
container sample_data.zarr in dataset called raw, which has one
attribute resolution = (1, 1):
imshow(zarr.open('sample_data.zarr')['raw'][:])

The basics: prepare and process
As we have already seen in the previous
tutorial, the concepts of requests and
batches are central to gunpowder. As a reminder, requests are send
upstream in a pipeline to ask for data, and batches are sent downstream,
being modified by the nodes they pass through.
This concept is illustrated by the following simple pipeline that reads image
data from a zarr source, picks a random location in it, and augments the
data (by random mirrors and transpose operations):
import gunpowder as gp

raw = gp.ArrayKey('RAW')

source = gp.ZarrSource(
    'sample_data.zarr',  # the zarr container
    {raw: 'raw'},  # which dataset to associate to the array key
    {raw: gp.ArraySpec(interpolatable=True)}  # meta-information
)
random_location = gp.RandomLocation()
simple_augment = gp.SimpleAugment()
pipeline = source + random_location + simple_augment

request = gp.BatchRequest()
request[raw] = gp.Roi((0, 0), (64, 128))

with gp.build(pipeline):
  batch = pipeline.request_batch(request)

imshow(batch[raw].data)
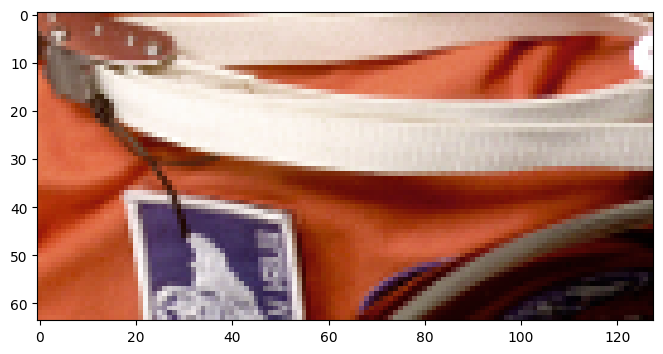
After building the pipeline, we request a batch by sending a specific
request. On its way up, this request gets modified by the nodes in the
pipeline it visits. When the request hits source, this node creates the
actual batch and fills it with the requested data. The batch is then passed
down again through the pipeline to visit each node a second time.
Most of the nodes in gunpowder are BatchFilters,
which implement two methods:
BatchFilter.prepare()is being called for a request that passes through the node on its way up the pipeline.BatchFilter.process()is being called for a batch that passes through the node on its way down the pipeline.
You can write your own node by sub-classing BatchFilter and implement
either of the two methods. To see how that works, let’s start with a simple
node that does nothing but to print the request and the batch that pass through
it:
class Print(gp.BatchFilter):

  def __init__(self, prefix):
    self.prefix = prefix

  def prepare(self, request):
    print(f"{self.prefix}\tRequest going upstream: {request}")

  def process(self, batch, request):
    print(f"{self.prefix}\tBatch going downstream: {batch}")
The argument to prepare is the current request being sent upstream.
process, on the other hand, is called with the batch. It also receives the
original request (the same one sent earlier to prepare) as a second
argument for convenience.
If we plug this new node into our pipeline, we see the following output:
pipeline = (
  source +
  Print("A") +
  random_location +
  Print("B") +
  simple_augment +
  Print("C"))

with gp.build(pipeline):
  batch = pipeline.request_batch(request)

imshow(batch[raw].data)
C	Request going upstream:
	RAW: ROI: [0:64, 0:128] (64, 128), voxel size: None, interpolatable: None, non-spatial: False, dtype: None, placeholder: False

B	Request going upstream:
	RAW: ROI: [-32:96, 32:96] (128, 64), voxel size: None, interpolatable: None, non-spatial: False, dtype: None, placeholder: False

A	Request going upstream:
	RAW: ROI: [187:315, 19:83] (128, 64), voxel size: None, interpolatable: None, non-spatial: False, dtype: None, placeholder: False

A	Batch going downstream:
	RAW: ROI: [187:315, 19:83] (128, 64), voxel size: (1, 1), interpolatable: True, non-spatial: False, dtype: uint8, placeholder: False

B	Batch going downstream:
	RAW: ROI: [-32:96, 32:96] (128, 64), voxel size: (1, 1), interpolatable: True, non-spatial: False, dtype: uint8, placeholder: False

C	Batch going downstream:
	RAW: ROI: [0:64, 0:128] (64, 128), voxel size: (1, 1), interpolatable: True, non-spatial: False, dtype: uint8, placeholder: False
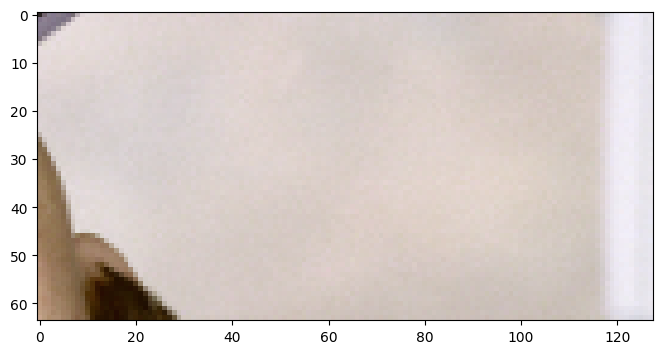
Our print node with the prefix C directly receives the request we sent.
After passing through simple_augment, we can now see that the request was
modified: simple_augment apparently decided to perform a transpose on the
batch, and is consequently requesting raw data in a transposed ROI, as we can
see from the request that print node B received. Notably, the new request
is technically out of bounds (the y dimension has a negative offset).
random_location, however, shifts whatever request it receives to a random
location inside the area provided upstream. We see the effect of that in
print node A, where the request has been modified to start at (177,
289). This is the request that is ultimately passed to source, which
creates a batch with raw data from exactly this location.
As the batch goes down the pipeline again, we see that each node undoes the
changes it made to the request. For example: random_location was asked to
provide data from [-32:96, 32:96]. Although it modified the request with a
random shift to read from [177:305, 289:353], it still claims the data came
from [-32:96, 32:96].
This is a deliberate design decision in gunpowder: Every node provides a
batch with exactly the ROIs that were requested. It would be quite surprising
if a request to a ROI [-32:96, 32:96] was answered with data in a ROI
[177:305, 289:353]. Instead, we treat nodes like RandomLocation or
SimpleAugment as views into some virtual data. This data does not
have to be static, it can change between different requests on the discretion
of the node.
A good way to think about RandomLocation is therefore that it provides
data in an infinitely large region. No matter where in this region you request
data, it will return a random sample of the data that is provided upstream, as
if this data just happened to be where you requested it.
Changing an array in-place
The following example shows how to perform a simple in-place operation on an
array. For that, we will create a node that inverts the intensity of the raw
data passing through it. We will use the invert() method from skimage
to do that:
from skimage import util

class InvertIntensities(gp.BatchFilter):

  def __init__(self, array):
    self.array = array

  def process(self, batch, request):

    data = batch[self.array].data
    batch[self.array].data = util.invert(data)

# ensure that raw is float in [0, 1]
normalize = gp.Normalize(raw)

pipeline = (
  source +
  normalize +
  random_location +
  InvertIntensities(raw))

# increase size of request to better see the result
request[raw] = gp.Roi((0, 0), (128, 128))

with gp.build(pipeline):
  batch = pipeline.request_batch(request)

imshow(batch[raw].data)
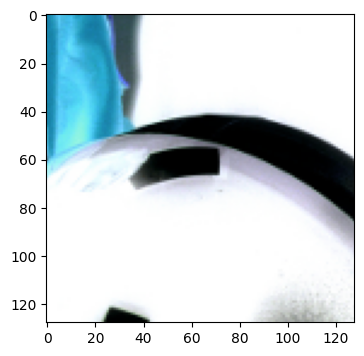
This example shows how to get access to the data of an array stored in a batch.
This is, in fact, not different from how we accessed the data of the batch
after it was returned from the pipeline. A batch acts as a dictionary, mapping
ArrayKeys to Arrays. Each Array, in
turn, has a data attribute (the numpy array containing the actual data)
and a spec attribute (an instance of ArraySpec, containing the
ROI, resolution, and other meta-information).
Note
It is good practice to pass the array key of arrays that are supposed to be
modified by a node to its constructor and store it in the node. Here, we tell
InvertIntensities to only modify raw. If our batch would contain more
than one array, this allows us to modify only the one we are interested in.
This does not apply to nodes that modify all arrays in a batch equally, like
RandomLocation or ElasticAugment.
Since our simple InvertIntensities node does not need to change the request
(it does not require additional data or change the ROI of an array in the
passing through batch), we did not have to implement the prepare() method
in this case.
Requesting additional data
Sometimes, the output of a node depends on additional data. Consider, for example, the case of simple Gaussian smoothing of the image. A naive in-place implementation would look something like this:
from skimage import filters

class NaiveSmooth(gp.BatchFilter):

  def __init__(self, array, sigma):
    self.array = array
    self.sigma = sigma

  def process(self, batch, request):

    data = batch[self.array].data
    batch[self.array].data = filters.gaussian(data, sigma=self.sigma)

pipeline = (
  source +
  normalize +
  NaiveSmooth(raw, sigma=5.0))

# request data in a specific location
request[raw] = gp.Roi((100, 100), (128, 128))

with gp.build(pipeline):
  batch = pipeline.request_batch(request)

imshow(batch[raw].data)
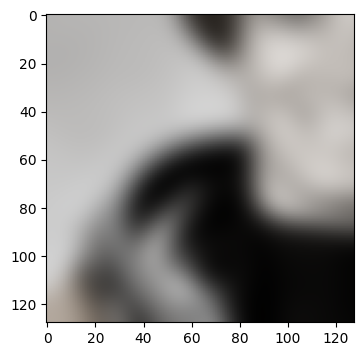
This does not look bad, but there is a subtle problem here: Gaussian smoothing
close to the boundary will have to fantasize some data that is not present
beyond the boundary. The skimage.filter.gaussian implementation will simply
repeat the last observed value at the boundary by default. We can see that this
leads to border artifacts if we make two requests of ROIs that are neighboring
and look at their concatenated output:
request_left = gp.BatchRequest()
request_left[raw] = gp.Roi((100, 100), (128, 128))
request_right = gp.BatchRequest()
request_right[raw] = gp.Roi((100, 228), (128, 128))

with gp.build(pipeline):
  batch_left = pipeline.request_batch(request_left)
  batch_right = pipeline.request_batch(request_right)

concatenated = np.concatenate([batch_left[raw].data, batch_right[raw].data], axis=2)
imshow(concatenated)
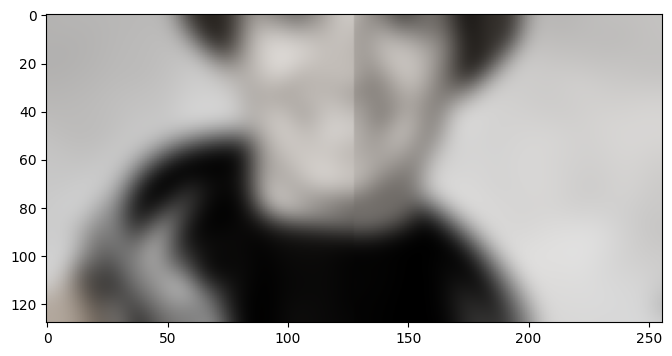
In order to avoid this border artifact, we will need to have access to more
data than just requested by the ROI we received. In particular, the amount of
context we need is given by sigma and the truncate value used by
skimage.filters.gaussian. The product of the two defines the radius of the
kernel that skimage uses to smooth the image. For a pixel at the boundary,
this means that it needs at most sigma * truncate additional pixels beyond
the boundary to compute the correct result.
The next version of our smooth node will therefore do the following:
Compute the context needed in each direction.
Increase the requested ROI by this context, effectively asking for more data upstream than what was requested from downstream.
Smooth the whole image it receives.
Crop the result back to the requested ROI.
class Smooth(gp.BatchFilter):

  def __init__(self, array, sigma):
    self.array = array
    self.sigma = sigma
    self.truncate = 4

  def prepare(self, request):

    # the requested ROI for array
    roi = request[self.array].roi

    # 1. compute the context
    context = gp.Coordinate((self.truncate,)*roi.dims) * self.sigma

    # 2. enlarge the requested ROI by the context
    context_roi = roi.grow(context, context)

    # create a new request with our dependencies
    deps = gp.BatchRequest()
    deps[self.array] = context_roi

    # return the request
    return deps

  def process(self, batch, request):

    # 3. smooth the whole array (including the context)
    data = batch[self.array].data
    batch[self.array].data = filters.gaussian(
      data,
      sigma=self.sigma,
      truncate=self.truncate)

    # 4. crop the array back to the request
    batch[self.array] = batch[self.array].crop(request[self.array].roi)

pipeline = (
  source +
  normalize +
  Smooth(raw, sigma=5.0))

with gp.build(pipeline):
  batch_left = pipeline.request_batch(request_left)
  batch_right = pipeline.request_batch(request_right)

concatenated = np.concatenate([batch_left[raw].data, batch_right[raw].data], axis=2)
imshow(concatenated)
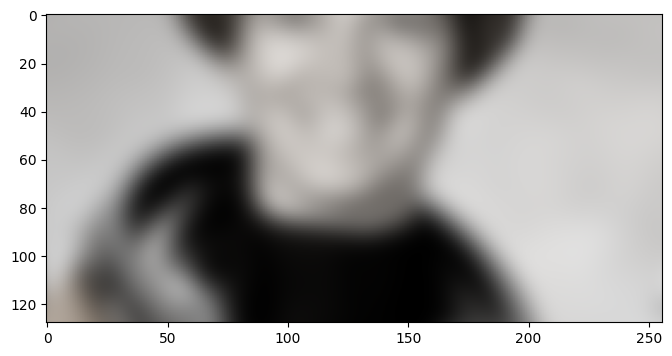
As expected, we used the prepare() method to enlarge the ROI of the
requested array. For that, we first compute the context needed as a
Coordinate. A Coordinate in gunpowder is really just a
tuple of integers, with some operators attached such that it is convenient to
add, subtract, multiply, and divide coordinates. All of those operations are
dimension independent. In fact, the node we have just written would equally
work for requests with an arbitrary number of spacial dimensions.
Note
Coordinate to be a tuple of integers is a deliberate design
decision. Those coordinates do also underly Roi, i.e., a ROI is also
always defined by an integer offset and size.
Still within prepare(), we use Roi.grow() to create a ROI that is
enlarged by context in both the negative and positive direction. Finally,
we create a new batch request with the enlarged ROI for array and return it
from prepare(). This instructs gunpowder to merge this dependency with
whatever else might be contained in the current request and pass this request
upstream.
When we receive the batch in process, it does contain data for array in
the enlarged ROI. After applying the Gaussian filter to it, we crop it using
the convenience function Array.crop(). This function uses the
meta-information stored in an Array to figure out where exactly to
crop the data (in particular, it uses the spec.roi and spec.voxel_size
attribute stored in the array).
Finally, we will have a look at the sequence of requests made in our updated
pipeline, using the Print node we wrote at the beginning of this tutorial:
pipeline = (
  source +
  normalize +
  Print("before Smooth") +
  Smooth(raw, sigma=5.0) +
  Print("after Smooth"))

request = gp.BatchRequest()
request[raw] = gp.Roi((100, 100), (128, 128))

with gp.build(pipeline):
  batch = pipeline.request_batch(request)
after Smooth	Request going upstream:
	RAW: ROI: [100:228, 100:228] (128, 128), voxel size: None, interpolatable: None, non-spatial: False, dtype: None, placeholder: False

before Smooth	Request going upstream:
	RAW: ROI: [80:248, 80:248] (168, 168), voxel size: None, interpolatable: None, non-spatial: False, dtype: None, placeholder: False

before Smooth	Batch going downstream:
	RAW: ROI: [80:248, 80:248] (168, 168), voxel size: (1, 1), interpolatable: True, non-spatial: False, dtype: <class 'numpy.float32'>, placeholder: False

after Smooth	Batch going downstream:
	RAW: ROI: [100:228, 100:228] (128, 128), voxel size: (1, 1), interpolatable: True, non-spatial: False, dtype: <class 'numpy.float32'>, placeholder: False
This confirms that Smooth did indeed increase the ROI for raw. We asked
to smooth with a sigma of 5.0 and set the truncate value to 4.0, which
gives us a context of 20. Consequently, the request send upstream out of
Smooth starts at 80 instead of 100, and the size of the ROI was grown by
40.
Although we did request more data for the same array we produce in this
example, this is not required. In your prepare() method, you can ask for
any ROI of any array. This might be useful if your node produces outputs that
should be stored in a new array (leaving the original one as-is) or to combine
multiple arrays into one.
Creating new arrays
If your node creates a new array (in contrast to modifying existing ones), one
additional step is required: We have to tell the downstream nodes about the new
array and where it is defined. This is done by overwriting the
BatchFilter.setup() function.
For the example here, we will revisit the InvertIntensities node. This
time, however, we will create a new array with the inverted data instead of
replacing the content of the array.
class InvertIntensities(gp.BatchFilter):

  def __init__(self, in_array, out_array):
    self.in_array = in_array
    self.out_array = out_array

  def setup(self):

    # tell downstream nodes about the new array
    self.provides(
      self.out_array,
      self.spec[self.in_array].copy())

  def prepare(self, request):

    # to deliver inverted raw data, we need raw data in the same ROI
    deps = gp.BatchRequest()
    deps[self.in_array] = request[self.out_array].copy()

    return deps

  def process(self, batch, request):

    # get the data from in_array and invert it
    data = util.invert(batch[self.in_array].data)

    # create the array spec for the new array
    spec = batch[self.in_array].spec.copy()
    spec.roi = request[self.out_array].roi.copy()

    # create a new batch to hold the new array
    batch = gp.Batch()

    # create a new array
    inverted = gp.Array(data, spec)

    # store it in the batch
    batch[self.out_array] = inverted

    # return the new batch
    return batch

# declare a new array key for inverted raw
inverted_raw = gp.ArrayKey('INVERTED_RAW')

pipeline = (
  source +
  normalize +
  random_location +
  InvertIntensities(raw, inverted_raw))

request = gp.BatchRequest()
request[raw] = gp.Roi((0, 0), (128, 128))
request[inverted_raw] = gp.Roi((0, 0), (128, 128))

with gp.build(pipeline):
  batch = pipeline.request_batch(request)

imshow(batch[raw].data, batch[inverted_raw].data)
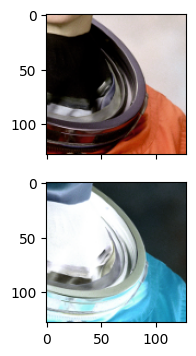
The main change compared to the earlier InvertIntensities is that we now
announce a new array in the setup() function. This is done by calling
BatchFilter.provides(). We pass it the key of the array we provide,
together with a ArraySpec. The ArraySpec describes where the
new array is defined (via a ROI), what resolution it has, what the data type
is, and a few more bits of meta-information. In the case here, we simply create
a copy of the ArraySpec of self.in_array. We have access to the
spec of self.in_array through self.spec, which acts as a dictionary
from array keys to array specs for each array that is provided upstream in the
pipeline. We can simply copy the spec here, since this is already the correct
spec for the output array. In more involved cases, it might be necessary to
change the spec accordingly.
Another significant difference to the earlier implementation occurs in the
process() method: Instead of changing the passing through batch in-place,
we now create a new batch, add the new array we produce to it, and return this
new batch. gunpowder will take the result of process and merge it with
the original batch. In fact, when we return None (as we did earlier),
gunpowder implicitly assumed that we returned the complete, modified batch.
This might seem complex at first, but there is a good reason for it:
The raw array we requested in InvertIntensities (to deliver
inverted_raw) might be different to what was requested independently
downstream. In other words, at some stages in the pipeline, there might be
different requests for the same array. gunpowder shields those conflicting
requests from you, i.e., the raw array you see in process() is exactly
the one you requested, independent of other requests that might have been made
to raw. By requiring nodes to return a new batch with whatever they
produced or changed, we simply eliminate some guesswork for gunpowder.
This allows us to run the following pipeline. Here we request raw in one
ROI, and inverted_raw in another, partially overlapping, ROI. Upstream of
InvertIntensities we now have two requests for raw: One to satisfy the
original request for raw, and the other one as a dependency of
InvertIntensities.
request = gp.BatchRequest()
request[raw] = gp.Roi((0, 0), (128, 128))
request[inverted_raw] = gp.Roi((64, 64), (128, 128))

with gp.build(pipeline):
  batch = pipeline.request_batch(request)

imshow(batch[raw].data, batch[inverted_raw].data)
